
My Pallet Breaking Method
As an upcycler of reclaimed wood, pallet breaking is a very frequent task. The process of which I have been doing for a good few years now. This has provided me the time to refine the process into a form that maximises the wood yield, minimises waste and removes (almost) all of the nails.
What follows is a run-down of my pallet breaking methodology, as well as showcasing the tools I use.
The Madness In My Method
Go online and you’ll find a plethora of social media types showing you “the BEST way to break a pallet”. Their way is usually a variation of one of two methods; using power tools or using hand tools (and, I suppose, any combination thereof).
Power Tool Method
As with any process involving power tools, this option will be quick and easy, especially if you’re on a time scale. You’ll be able to break down a number of pallets in no time at all. But (as with all things, I’ve found), there are some cons as well as the pros.
The main cons for me (they may not be cons for you and your use for the pallets), with most of the power tool methods I’ve seen, are;
- Some of the usable wood is inevitably sacrificed due to the deconstruction process. Using a circular saw to effectively “top and tail” each of the pallet planks does make removal far easier. But, unless you’ve got a specific use for the bits with the nail holes in, then they’re just wasted.
- The nails holding the pallet together are sometimes cut, so that they’re virtually impossible to remove from the pallet blocks. This makes it much more difficult to make these blocks into tealight holders, as I have no wish to damage any of my expensive forstner drill bits or saw blades.
- Finally, you can’t use power tools without the “power” element. I don’t want to have to keep charging/changing batteries part way through the process. Nor do I want to trip over mains extension leads, as mains powered tools never have leads long enough. Plus, are mains outlets ever in the most convenient position?
Hand Tool Method
For me, the hand tool method of pallet breaking is more of a therapeutic process than a chore. Which, ultimately, provides a focus for my ever-chaotic thoughts and calms my soul. This method also (as mentioned at the top of this article) has a far greater chance of reclaiming the most resources out of the pallet. But, this does come at the expense of the time it takes and care taken to do it.
I love the nail holes in the planks I get from each pallet. They give each piece I create a unique character, as much as the wood grain itself. And, although I do like to keep the planks whole, should one (or two) break in the process, then that’s character too.
Pallet Breaking Tools
Whilst you could potentially break apart a pallet with your bare hands, I wouldn’t advise it. At least, wear gloves (oh, the splinters I’ve had). A few hand tools within arm’s reach will make the process a lot less strenuous.
Using the most appropriate tools for the job, too, will go some way to saving precious chisel edges and the blades of large flat head screwdrivers. Having said that (and factoring in my loathing of flat head screwdrivers), it’s probably the best use for said screwdrivers. I suppose, if you have a few old ones laying around specifically for this job, then it’s not really that much of an issue. #CorrectToolForTheJob
There are many tools that can be used in the pallet breaking process, but these generally fall into either of two categories; hitting and prying. There is one tool type exception that I use that doesn’t really fall into either category, but more on that in a bit.
What follows is a description of my “go to” hand tools, when I need to take pallets apart. I really should think about making these into a kit.
Disclaimer: I am in no way sponsored or have received any incentive (cash or otherwise) from any of the companies that manufacture and/or sell the tools featured below. #NotSponsored
Pallet Buster

The Gorilla Pallet Buster, from Roughneck®, is the first tool I reach for when pallets are to be taken apart. Weighing in at almost 3kg, this tool is a heavyweight beast, compared to the other hand tools in this blog. With its drop forged, heat treated, solid metal construction, this tool means business and should last me many years of busting (providing that the welds are good and hold).
The only tiny niggle that I’ve come across, whilst using this tool (and this situation has only occurred twice since I bought it), is that on some pallets the planks are too wide to fit between the claw prongs. Thus, making it impossible to use the tool on that pallet.
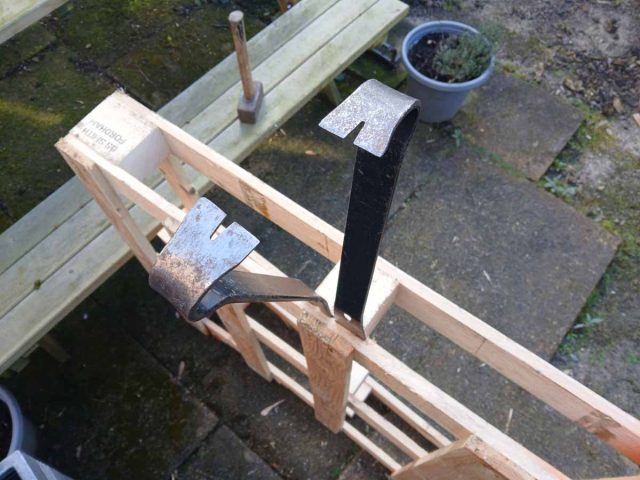
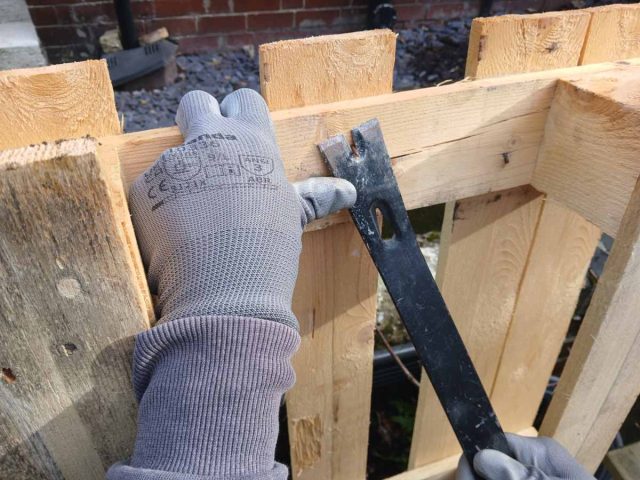
Flat Pry Bars
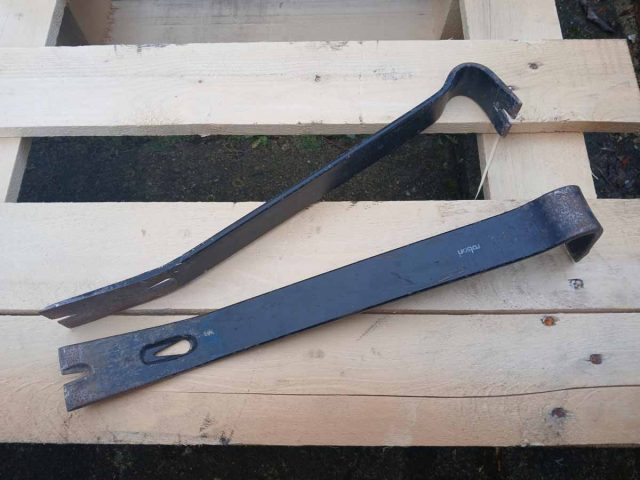
I have four (yes, four) of these 15” (381mm) flat pry bars. Not that I use more than two in any given pallet breaking situation (as per the above image), and the reasoning behind having that many is a long (and irrelevant) story. These are the Rolson® brand and cost me around the £5 ($6 USD) mark each.
I really should think about buying some more in longer lengths and I’ve found a Sheffield firm that manufactures them, but there are other priorities right now.
Carpenters’ Pincers
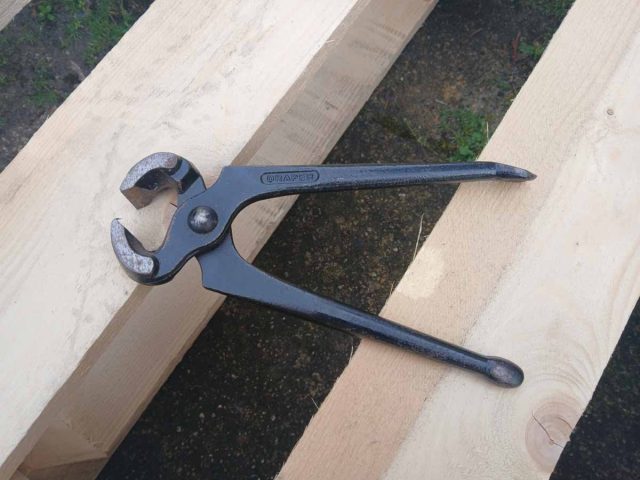
Pincers are not an essential requirement for pallet breaking, but if a nail head should shear off then these babies come into their own. My Draper ones are small (said the bishop to the actress), and if I’d have thought about it earlier, I would’ve purchased some with longer handles for better leverage.
I do have my eye on a 300mm pair of Knipex® Farriers’ pincers, so if someone wanted to send me a gift, it would be greatly appreciated (and some have said that I’m hard to buy for) *rolls eyes*.
Club/Lump Hammer
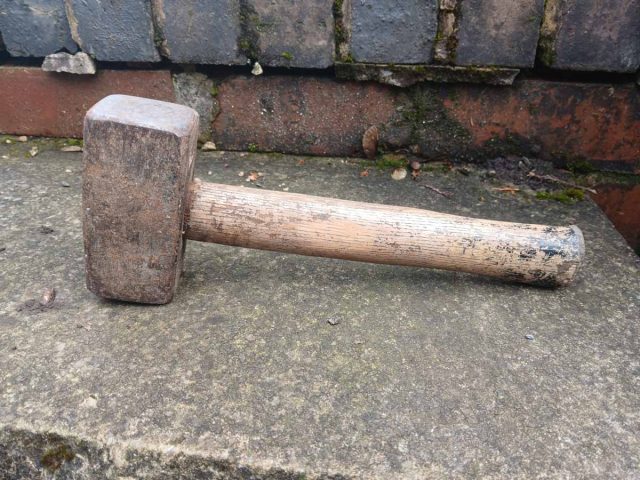
When you need a bit of “Oomphf”, then you need a club/lump hammer. The one I have was my dad’s and it’d seen some use way before I got my grubby little mitts on it. The head is prone to flying off, every once in a while (I really need to get around to replacing the handle), but it does the job.
Claw Hammer
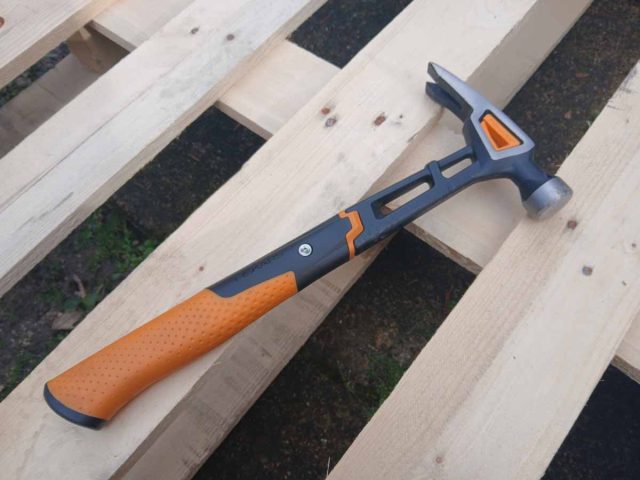
If I were forced to use only one tool to break apart a pallet, then a claw hammer would be it. If I could have two claw hammers, then that’d be all I needed. But, the practicalities are that other tools can do a better job in certain circumstances. Although, if you’re punching out nails (see below) with the hammer, then being able to just flip the plank over and extract the nail (or nails) is advantageous.
My weapon of choice, at the moment, is a Fiskars® IsoCore 16oz Finishing Hammer (just because). But, anything similar will do the job.
Spontaneous Reminiscence Warning! (tears may be shed): I used to own an Estwing® 21oz weight-forward claw hammer. It was a beauty to behold, with its curved handle and square striking face, it handled like a dream. Then my entire hand tool collection was lost in shipping when I had to move back to the UK from Australia, back in 2018. I was devastated (to say the least). They haven’t been available for a while and the cheapest used one I’ve found online is £120 ($150 USD)!
Nail Punches
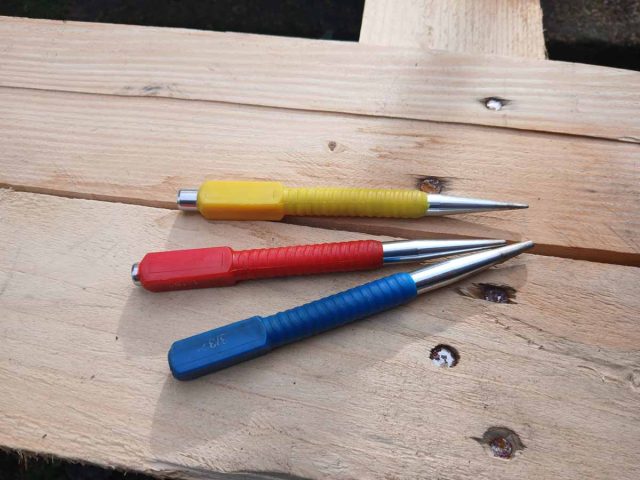
As mentioned further up, nail punches fall into neither the hitting nor prying pallet breaking tool categories, yet they are (I feel) essential to the process. The ones I have are a “cheap as chips”, no-name brand from Temu or Amazon, or someplace (I don’t remember where).
If you find (and you invariably will) nails in the pallet planks that have either snapped or have been cut flush with the wood, then a nail punch and a hammer will easily pop the nail head proud of the wood to be able to lever it out.
Bonus Tool
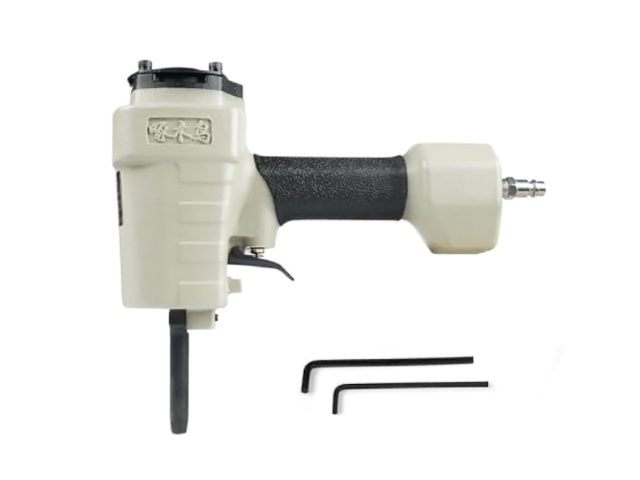
There is one tool that I do not possess, which I’ve been thinking about purchasing for a while. But, I have yet to find the right one. And that tool is a pneumatic nail punch/puller. Not one of the major, well known and trusted brands, that manufacture pneumatic tools, seem to produce them (as far as I can glean from copious internet searches). So, what you’re left with are only Chinesium “brands” as options, sold on Amazon, eBay, etc. My problems with Chinesium are; quality and how easily would it be to get a hold of spare parts?
I did find a brand in the USA, but the price difference was more than £200-£300 ($250-$380 USD), over and above the Chinesium offerings. But, if the quality, customer support and spare part availability was exemplary, then maybe, maybe, it would potentially be worth the extra cost (and exorbitant import charges).
More research needed.
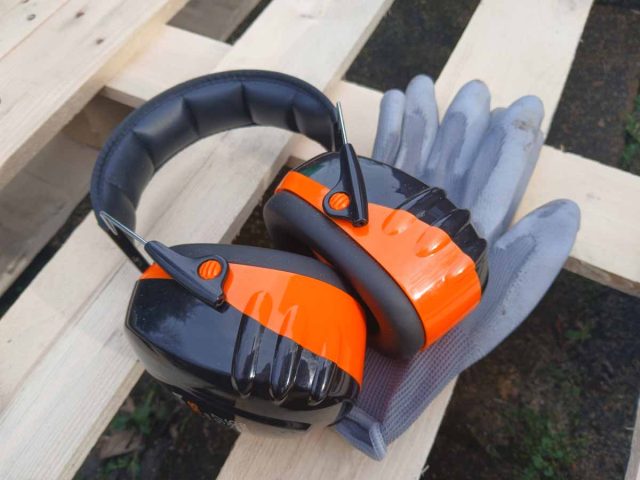
Safety First
Before we get into the nitty-gritty of my pallet breaking process, I’d be remiss if I didn’t mention any aspect of safety. Flying nails, splintering wood, heavy pallets (or pallet buster, for that matter), loud impact noises and hammering are amongst the potential hazards, when breaking pallets apart. Hazards to you, your loved ones, your pets, low-flying aircraft and any other wildlife that may be in the vicinity, whilst you work.
So, before you start, think about safety eyewear, gloves, (potentially) hearing protection and safety footwear for yourself. I’ve recently (since writing and posting this blog) upgraded my hearing protection to a pair of ISOtunes® Pro Aware 2.0 earphones. I’ve written a review, which can be read here.
Once you got yourself kitted out, then think about others that may be close by and the location you’re working in.
Having said that, I’m not your mother! So, feel free to do as you damn well please. I’m just making sure I’ve covered my arse if you inadvertently smack yourself on the back of the head with a hammer, or somesuch. #IToldYouSo
Before Starting
In the first instance, I endeavour to make sure that the pallet (or pallets) I’m planning to dismantle are as dry as practicable. If the wood contains a high level of moisture, then, once removed, it will be more liable to warp as it dries out. This could then cause other issues and headaches later down the line when trying to make something out of the reclaimed wood.
(Pallet) Busting Makes Me Feel Good
If you’ve stuck with me thus far, then I thank you with every essence of my being (and I mean that from the heart of my bottom). I honestly didn’t intend for this blog to be quite this long (1772 words and counting), but there you go.
So. I have my pallet (or pallets) I wish to dismantle, my tools, a travel mug of Earl Grey and the time to make a good job of it (before it pisses down with rain. Typical UK weather!). Let’s get to some pallet breaking.
First Steps
Not all pallets are created equally. So, unless I have the Holy Grail of pallets that’s already falling apart and the nails are loose, then I’ll take a moment to see how each pallet is constructed.
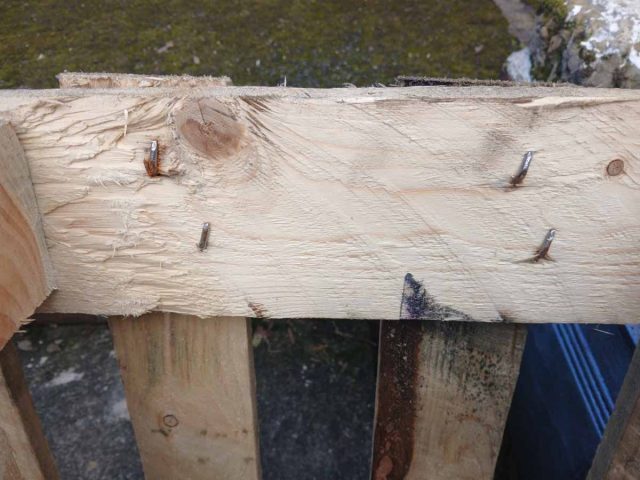
Flipping the pallet over and checking underneath the top planks for nails that have been bent over is usually a good start. These will need to be bent back to somewhere straight again. But, that can be done later, as there’ll potentially be more bent nails under the pallet blocks that you can’t see.
Pallet Blocks
The nails going into the pallet blocks from the bottom plank rails will be straight, so getting the blocks and rails off should be fairly straight forward. There isn’t really any time saving to be gained by removing the bottom plank rails before detaching the blocks from the top part of the pallet, or vice versa.
So, if there’s a gap already anywhere in the bottom rail/block construction, then that’s usually where I’ll start. Using the club/lump hammer to force one of the flat pry bars (flat end) into any gap that presents itself. I then use a pumping motion to try and loosen the block from the top, or the plank rail from the block.
If the block/plank is being particularly stubborn, then I’ll grab a second pry bar and insert it (flat end, but inverted) next to the first. I’ll then use a push/pull motion on the bars in opposite directions, whilst swapping directions frequently (like a 7 year old pretending to operate a crane or digger. Not that I ever did that. I wanted to be a chef). This should create enough gap for the next step.
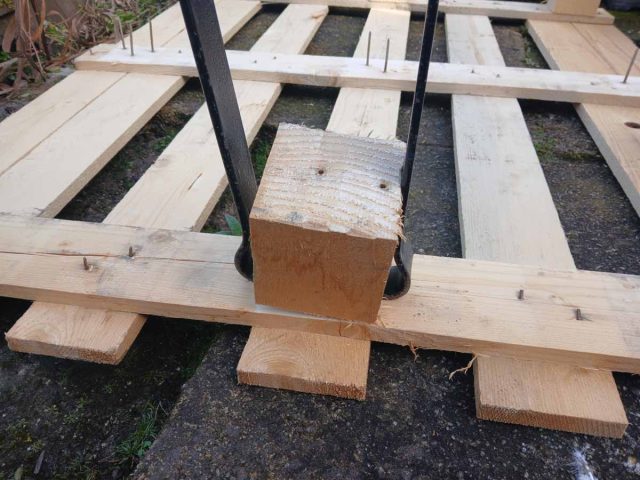
Once there’s enough gap at both sides of the block, I’ll reinsert the pry bars (curved ends), one each at opposite sides of the block. I’ll then use a combination of rocking motion and forcing the pry bars apart to entice the block to relinquish its grip on the nails.
Eventually, something will give (not always in the way you want) and you’ll be able to work on all of the other blocks and plank rails. More often than not, when I’ve completed this part, there’ll be a few nails still in a block, or two. These are a complete bugger to get out, but I’ve come up with a process to remove them. This is described further down, so read on.
Straightening Nails
Once the pallet top is completely free from the pallet blocks, I’ll then make a start on straightening all the bent nails. For the majority of the time, it’s a simple task to use the flat end of a pry bar to force the nails somewhere near straight again.
Depending upon the nails used to build the pallet, nail points can sometimes be embedded into the wood. In this instance, I’ll use a corner of the pry bar to gouge out the nail point enough to be able to straighten it.
Pallet Top Deconstruction
Once all of the nails are straight(-ish) is when I reach for my trusty pallet buster. Placing the pallet top on the ground makes this next step a cinch. It’s just a case of prying the pallet top planks apart. Simple.
Nail Removal (Pallet Planks)
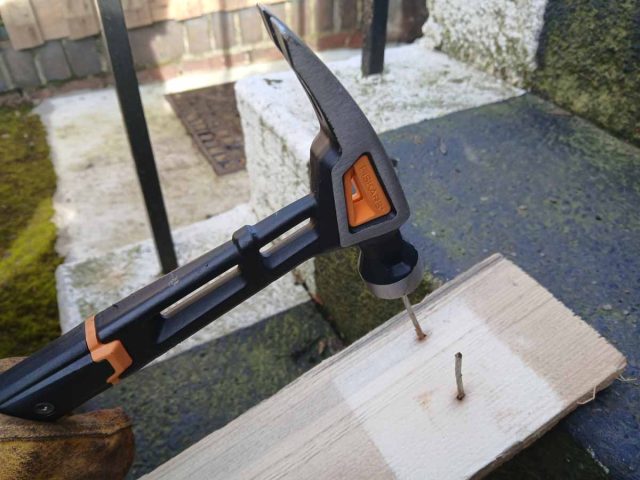
I now have a pile of planks with nails in. The previous two steps should have now straightened the nails enough, to be able to knock them through the plank with the hammer. I only really need to get the nail head out and above the surface of the wood, then it can be levered out from the other side. Either with the hammer or one of the pry bars.
Pro Tip (I really should stop): Using stone steps, a wall or other solid surface greatly helps to remove the bounce, when hammering out the nails. Keep the nails as close as possible to the edge & move the plank for nails near the center.
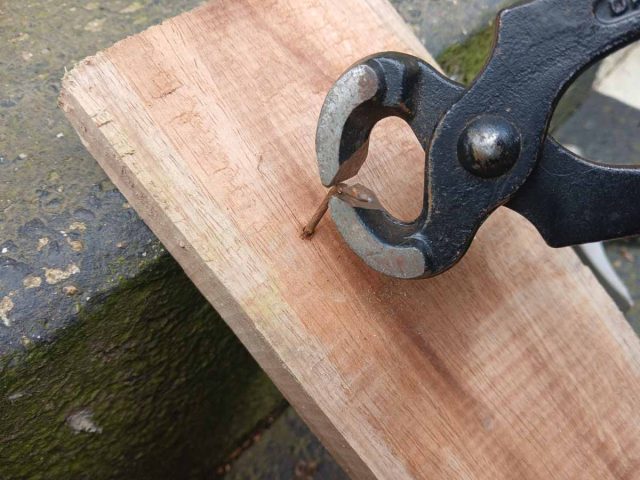
However, if some of the nails are particularly long (like the ones that go into the pallet blocks), or they’re just being a bugger, then they may have a tendency to bend over. In this instance I usually use the carpenters’ pincers to snap off the majority of the offending nail. This makes it much easier to hammer these nails through.
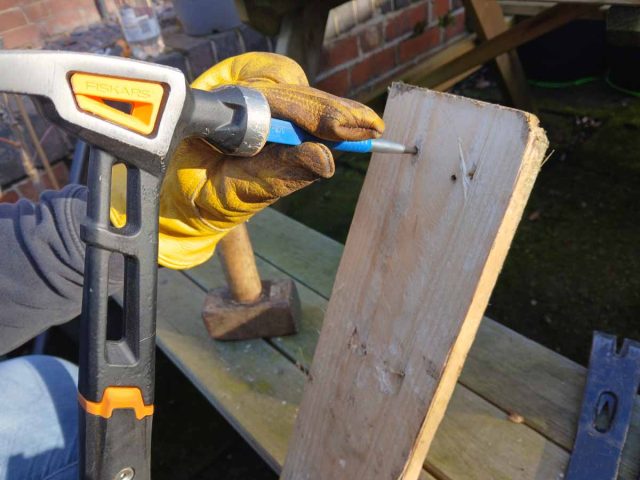
There are occasions where nails have either sheered flush with the surface of the wood, or they’ve been cut. This is where the nail punches come into play. A set usually comes with three sizes, so selecting the best one depends entirely on the nail/hole size. Hammer the nail through enough so that the nail head protrudes the other side and can be removed with either the hammer claw, pry bar or carpenters’ pincers.
Nail Removal (Pallet Blocks)
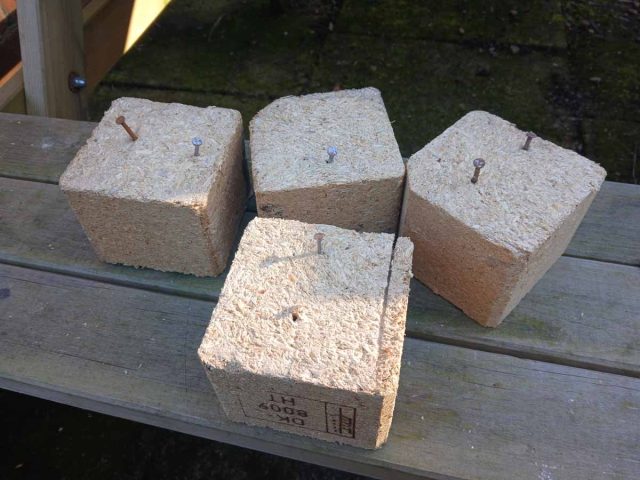
As mentioned further up, there’s a good chance that I’ll end up with at least some pallet blocks with nails still in them. If the nails are far enough away from where I’d be drilling the blind hole in the top, for the tealights to sit, then I’d just grind off the nail head and punch the remaining nail further into the wood. If not, then I used to just throw these blocks on the burn pile, as I could never get enough leverage on the nails to extract them. Having said that, if the blocks were the compressed woodchip type and not solid wood, then they’d go on the burn pile anyway.
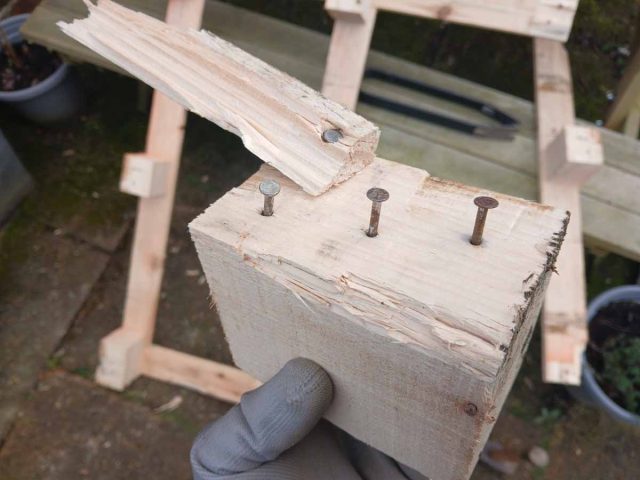
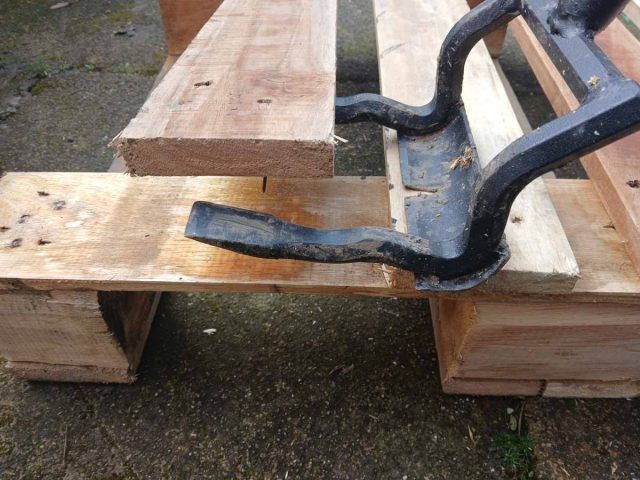
Then I had a “lightbulb” moment and came up with the process I now use to remove (pretty much) all nails from pallet blocks. I say “pretty much”, as every now and again the nail heads are too damaged to get enough purchase, or the heads just ping off.
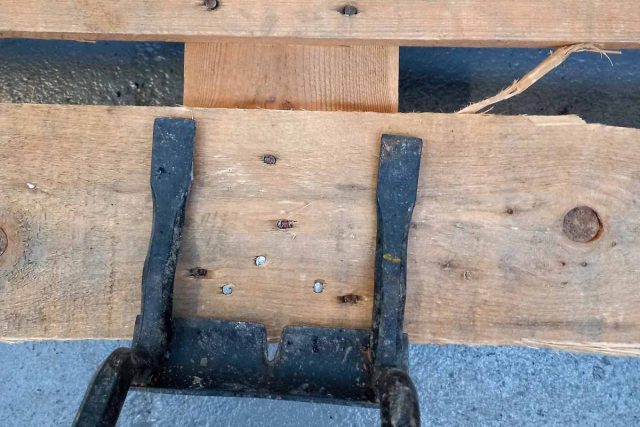
So, what I do now is to use two flat pry bars and use one against the other to extract the nails. The pry bars I have have what I can only describe as hanging holes (I’m sure they’re for other tasks, but I’m not sure what. Other than what I’ve come up with).
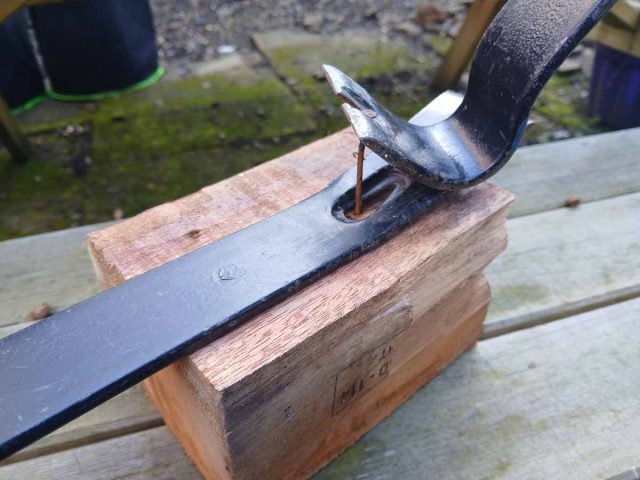
I place the hole of one pry bar over a nail head, so the bar is flat to the block. I put the curved end of the second pry bar on top of the first, with the claw under the nail head. With one foot on the first pry bar, I use the aforementioned pumping motion to pull the second pry bar in the opposite direction. It may take a bit of time (I think this is where I need a few longer pry bars for leverage, as mentioned previously), but nine times out of ten the nail is removed from the block.
Metal Recycling
So, what to do with the nails? Rather than just throw them in the bin, with all the general household waste, I keep them in an old paint tub. Once the tub is full (or particularly heavy), I’ll take them to my local metal recycling merchant to cash it in. It’s not much, but (as the Tesco ads used to say) every little helps.
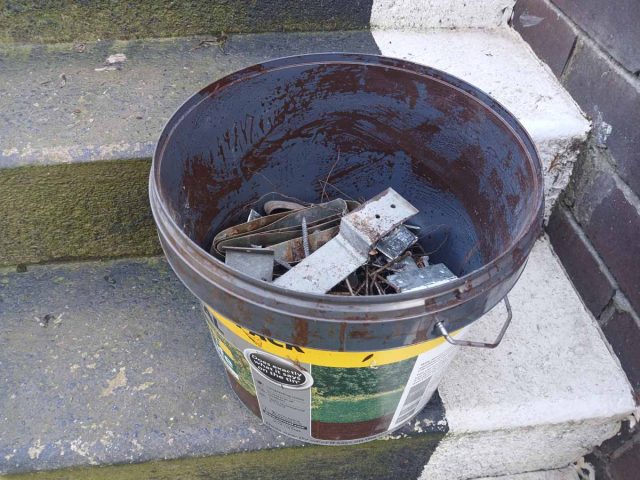
I usually keep all the reclaimed metals from my upcycling/recycling endeavours (aluminium, copper, steel, etc), in separate containers. I have toyed with the idea of getting a small forge, to melt the metals down. But, that’s something for another time.
Reaping The Rewards
After all of the banging, prying, hitting my thumb with a hammer and swearing, what I end up with is a nice pile of usable timber, for whatever creative ideas and projects I can come up with. There may be a few broken planks, but (as I’ve said more than once) these can add character to certain projects. Especially, if I’m going to be using them in some creative pyromania projects. #BurningShitIsTherapy
I really hope you have found this useful. Even if you don’t employ my process in its entirety, may be some of the techniques I’ve described will inspire you in your own pallet breaking.
C…
Further Reading And Footnotes
For more information about me and all that is Silverhand Creative, go check out the About Me page on this website. I have a presence on Instagram and Facebook, where I post photos (and the odd video) of ongoing and finished projects. There’s also a YouTube channel, where you can see how I go about doing what I do and what tools I prefer to use. So, feel free (there’s no pressure) to follow and/or subscribe to any (or all) of the above.
I am most definitely amenable to commission work and have a web form for you to get in touch, should you be looking for something a little more custom.
All trademarks (registered or otherwise) used in this blog lie solely with their respective owners.