
Picking The Project
I love using the Yakisugi burning process in my creations. Although, this process doesn’t always lend itself fully to every single project (unfortunately). #BurningShitIsTherapy
In the projects where I can use Yakisugi, the results are extremely eye-catching and aesthetically pleasing. Said projects are mainly (but not limited to) small to medium-sized items for the home; Tealight holders, clocks, shelving, wall signs, etc. Whenever I have these items on display at craft fayres and markets, they always attract attention and positive comments.
What follows is a quick rundown of the process that is Yakisugi and how I use it for such projects.
Tools Of The Trade
Let’s use the 300mm Pallet Wood Wall Clocks I make as the example, for the purposes of this blog. Once the 300mm discs have been cut out (using a combination of jigsaw and router) of the glued up pallet boards, I set about burning all of the surfaces. For this I will tend to use my Sievert® Pro 86 torch and nozzle, attached to a 13kg bottle of propane. This torch is pretty much my “go to”, but it does depend upon the size of the area that I have to burn.
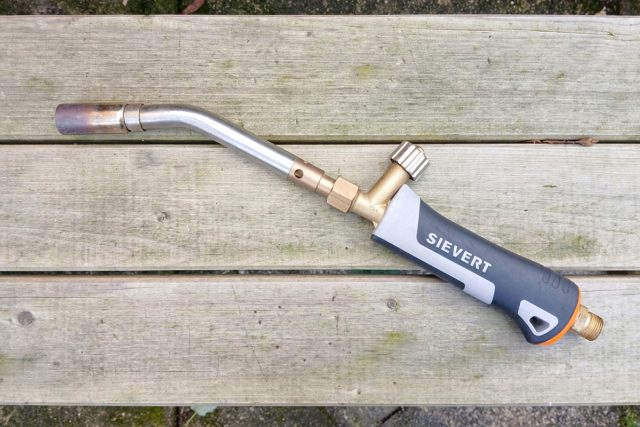
If I’m burning a large surface area (or have multiple flat items to burn, such as signs) then I will use a weed burner, hooked up to the propane bottle. The Sievert® Pro 86 is better for when I have a batch of smaller surfaces to burn (such as; when I have quite a number of tealight holders to process in one go).
For small areas (a clock circumference), one-off items, or if I need to quickly touch up a burnt area (either a bit that I’ve missed or not burnt enough), then I have a Rothenberger SuperFire2 plumber’s brazing torch. This connects to the usual 400g, screw-on propane bottles, of which I always have a few in the workshop. On the odd occasion I should require a fine or delicate burn, then I use a cheap, refillable, no-name chef’s brûlée torch.
“The people laughed ’til she said, BURN”
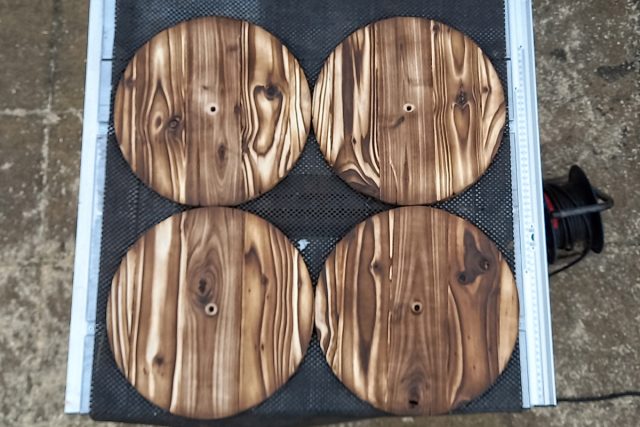
The amount of burn required is entirely dependant on the type of project and the finish required. Where a (relatively) level surface is required, then a light burn is enough. This is where the flame of whichever torch is being used, is quickly passed over the surface of the wood, so that it’s blackened all over, but hasn’t started to crack. For a more scalloped finish, then a deep burn is required. This is where the flame is held long enough over the wood, so that the typical crocodile/alligator skin-type crackle finish is achieved.

Pro Tip: (Still makes me giggle every time I put this in a blog) Should I need to add fixtures and/or fittings to a creation, then I’ll use a sacrificial item to mask out the area prior to burning. For this example, the clock movement is bolted onto the clock, from the front. Therefore, I’ll use a washer of the same size (or larger) and bolt this through the hole where the spindle goes. That way, when the blank is burnt, the bit of wood under the washer will be untouched by flame. Thus, when the movement is finally attached to the clock, the spindle for the hands will remain (relatively) perpendicular to the clock face.
I use a similar process for coat hooks, hinges, etc. The mask doesn’t have to be the exact item, either. Anything (like a piece of scrap wood or metal) that’s the approximate shape and size of whatever it is that will eventually be added to the project, can be used.
Brushing
Whichever burnt finish is required, the next step (over and above this traditional Japanese wood preservation method) is always brushing off the carbonisation. Removing this char really brings out the natural grain of the wood, as the harder (more resinous) parts of the grain remain darkened and the softer (less resinous) parts wear away and become lighter.
Pro *sniggers* Tip: This “burning and brushing” technique works best on woods that have a wide grain; Cedar, Pine, etc. In my initial experiments with Yakisugi, I tried the process on a piece of scrap oak and the results were (quite frankly) shite. I do have other plans for an oak finish, but that’s a whole other process (and blog).
What I use to brush off the char, on the majority of my Yakisugi creations, are 100mm nylon filament strip brushes. These brushes can be fitted into the chuck of most powered drills. There are a few brands available in the UK (one of which is made by a company just up the road in York. #MadeInYorkshire). Most of these brands are comparable in quality, but do vary in price. If a brand has the option of ‘coarse’ or ‘fine’ grit or grade, I would suggest sticking with ‘coarse’.
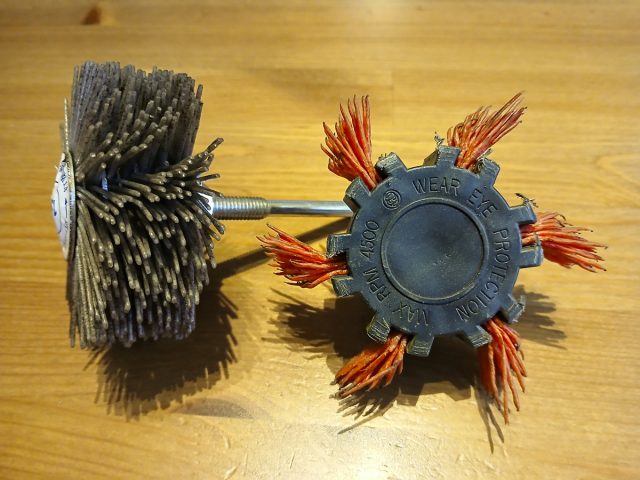
If I need to brush into corners or other awkward places (where the radius of the filament strip brushes prohibit), then I’ll use a small wire brush.
Pro Tip: (It never gets old) Remember to always brush in the direction of the grain of the wood (irrespective of whatever brush type is being used). This will greatly reduce the appearance of any scratch marks.
Finishing Touches
Once the brushing phase is completed, I use a tack cloth to clean off any remaining wood dust before continuing. These are relatively inexpensive, and there are a few options out there.
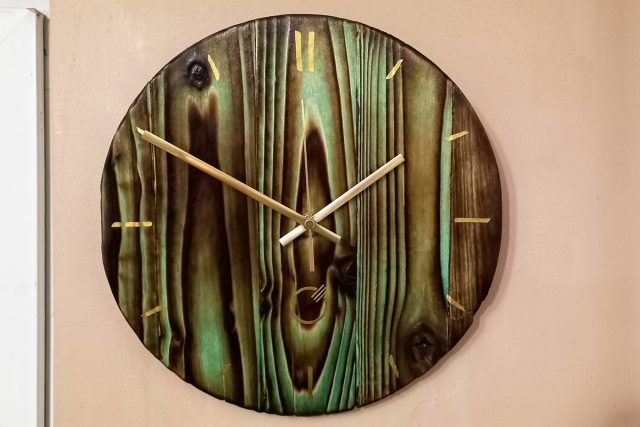
Then, the wood can be left ‘au naturel’ and a top coat applied directly to it, or (as I love to do) a stain can be applied before the top coat. For me, the more colourful the stain the better, as the end results speak for themselves.
Further Reading And Footnotes
Should you wish to know more about the traditional Japanese wood preserving process, that is Yakisugi, please check out my blog post on the subject.
For more information about me and all that is Silverhand Creative, go check out the About Me page on this website. I have a presence on Instagram and Facebook, where I post photos (and the odd video) of ongoing and finished projects. There’s also a YouTube channel, where you can see how I go about doing what I do and what tools I prefer to use. So, feel free (there’s no pressure) to follow and/or subscribe to any (or all) of the above.
I am most definitely amenable to commission work and have a web form for you to get in touch, should you be looking for something a little more custom.
All trademarks (registered or otherwise) used in this blog lie solely with their respective owners.