
What Is Oak Burnish..?
What is Oak Burnish, indeed..? Anyone reading this blog (aah, I can but dream) may probably already know what this solution is, how to make it (the blog title really is more than a bit of a giveaway) and/or what it does. But, for those that haven’t seen the myriad of YouTube videos or other articles online, here’s a quick rundown to start with.
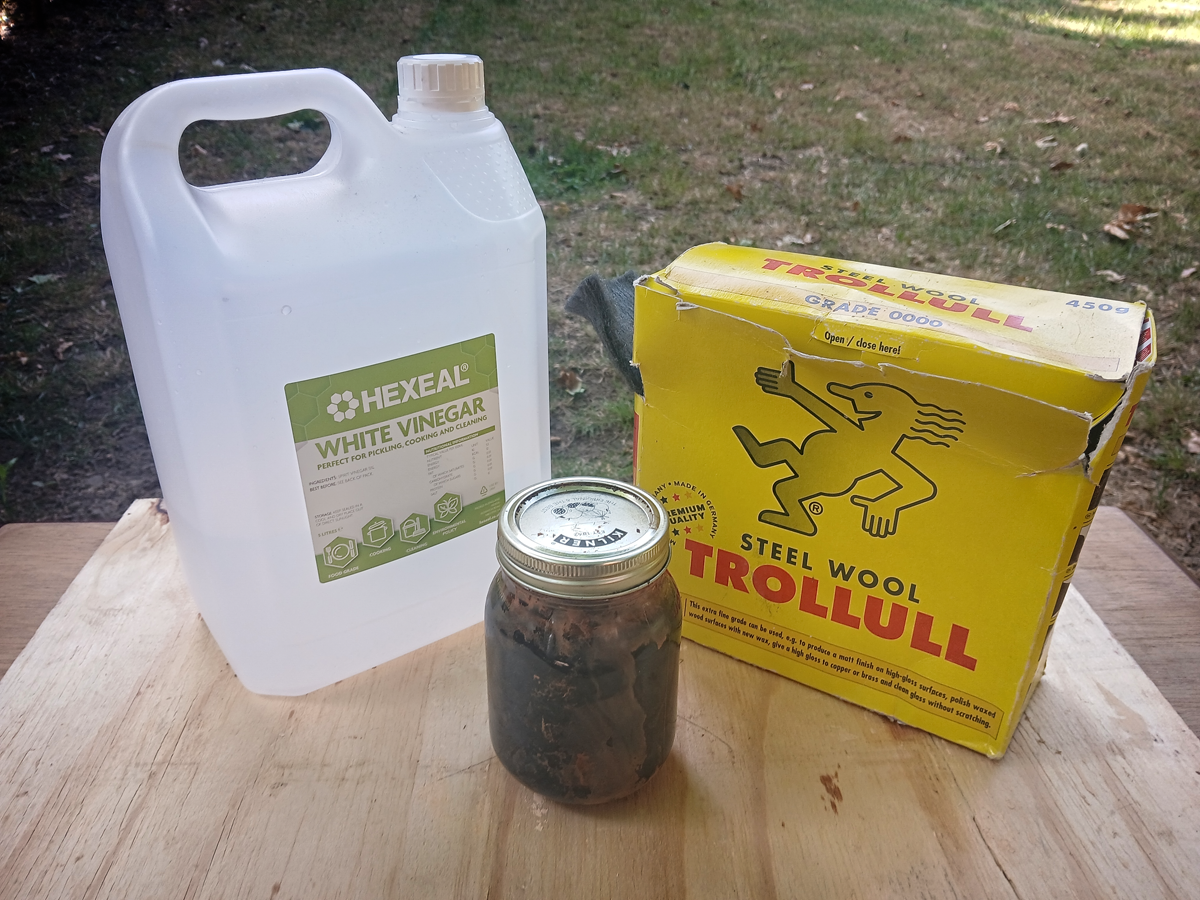
Oak Burnish is a concoction ”brewed” from steel wool and vinegar (unsurprisingly). Once the brewing and straining phase is done (which is detailed further down in this article), it can be applied to wood like any other wood stain. This application will alter the colour of the wood. How quickly this change occurs, and to what extent, depends entirely on the species of wood it’s being applied to. But, more on that later.
Why Is It Called Oak Burnish..?
Oak Burnish is so-called, as it has been a traditionally used oak “stain” for decades (here in the UK, at least). Once applied, it will turn the colour of the wood to an almost black colour. I can’t say (for sure) who first came up with the idea of sticking a very fine grade of steel wool into vinegar to make this solution. But, I would suggest it was (like most discoveries) found completely by accident.
What Makes Oak Burnish Work..?
Right. So here’s the bit that pretty much every other video or blog on this subject seems to gloss over, or completely omit. Either the authors, of said vids and blogs, don’t have a clue why Oak Burnish works (due to them just copying what others have done before), or they don’t think it’s worth bothering with. But, a little understanding of why will go a long way to you being able to predict the effects of Oak Burnish on other varieties of wood.
Unlike all of the coloured wood stains you can buy from any of the major hardware stores, Oak Burnish doesn’t use any dye pigments to colour the wood. Instead, the application of this solution causes a chemical reaction with the tannins present in all wood species. It’s this reaction that oxidises the wood, thus changing the colour of it.
Natural wood oxidation (or ageing) is a slow process that happens over many years. It occurs due to the wood’s exposure to oxygen in the atmosphere and to UV radiation from sunlight. Depending on the species of wood, this ageing process will either make the wood appear lighter or darker in colour. Oak Burnish is a fast-track process, so you can achieve that aged look to your project, without having to wait years (or fork out extravagant amounts of cash).
Wood Tannin Content
Not to get too technical, but tannins are a type of polyphenol (apparently), which are found in varying concentrations in all wood (and plant) species. The specific concentration of tannins, in each wood species, influences both their use and characteristics.
Woods like Quebracho and Chestnut, which boast high tannin content, makes them ideal for use in leather tanning. Whilst Oak contains rich tannins that make it the perfect choice for aging wine and whiskey, by imparting complex flavours. Walnut is a moderately tannic wood, which offers versatility for furniture and flooring. Then at the bottom of the tannin content list are woods like Pine and Birch.
More Tea Vicar..?
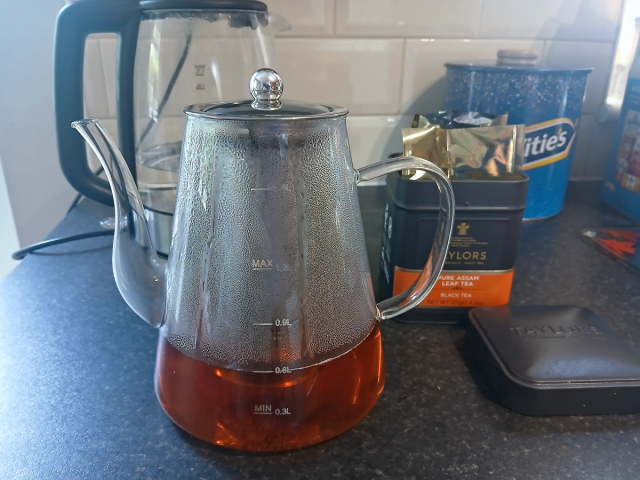
If you’re not using a species of wood that has a high tannin content (Pine or Birch, as just mentioned), but you want to get a darker stain shade from your Oak Burnish, you can. How, you may ask? Simply by adding more tannins into the wood before you apply the Oak Burnish. And, as the above sub-heading suggests, tea is a great (and easily obtainable) source of tannins.
Making a really strong cup of tea (without milk and sugar, obviously), letting it cool, then applying this to the wood before applying the Oak Burnish (once the tea wash has dried), will increase the chemical reaction when the Oak Burnish is applied subsequently. But, as I mentioned earlier, with differing tannin content in the various wood species, tea varieties also have varying concentrations of tannins in them. So, which tea has the highest percentage of tannins?
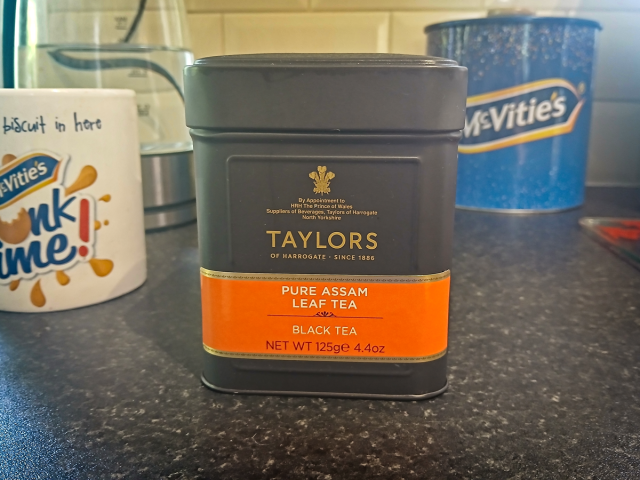
Whilst researching the details of this article I found an academic paper by Yoshiyuki Takeda, entitled; “Differences in Caffeine and Tannin Contents between Tea Cultivars, and Application to Tea Breeding.” Jarq-japan Agricultural Research Quarterly 28 (1994): 117-123. In this paper (published on the 1st April 1994 – not an April Fool’s joke) it shows that Assam varieties of tea tend to have a higher percentage of tannins (along with caffeine) in them, over and above other varieties.
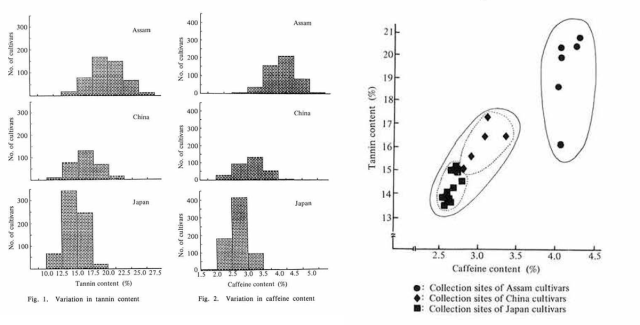
The above graphs are extracts taken directly from the aforementioned paper and show the percentage of tannins and caffeine in the different tea varieties. If you’re a geek (like me), then there’s a link to this paper in the Further Reading And Footnotes section at the bottom of this blog.
How To Make Oak Burnish
If you look online, there appears to be two main methods of making Oak Burnish, which (for the purposes of this article) I’m going to refer to as; ‘The Cold Method’ and ‘The Hot Method’. The former method is all I’ve ever used in the past to age wood. So, it did come as a bit of a surprise when I was performing my research to find an article online detailing ‘The Hot Method’.
In the interest of science, the betterment of the Homo Sapiens Sapiens species as a whole, and for completeness sake (plus, I’m intrigued to see how they compare), I’ll be detailing how to make both methods.
The Cold Method
As I’m more familiar with this method, I’ll run through the procedure for making it first.
What You Will Need
- 000 or 0000 grade steel wool
- Distilled white vinegar
- Two (2) identical glass containers with either a screw-top or clip-on lid.
- An old pair of large scissors.
- A chef’s brûlée torch or blow torch (optional).
- Filter material.
- PPE (NOT optional, but then again; #NotYourMother).
CAUTION: Although distilled white vinegar for household use is typically a solution of 4% to 6% acetic acid in water, it’s still an acid. Hence, the PPE entry in the above list.
I’ve deliberately not provided amounts and volumes, as the container needs to be large enough to hold the amount of Oak Burnish needed for your intended use. Thus, depending on the size of your project you’ll need to have enough steel wool and vinegar to fill your container.
The Process
Wax On. Wax Off
The first thing that must be done, when performing either method for making Oak Burnish, is to remove the protective coating that’s usually on steel wool (especially on the finer grades). This can take the form of a thin layer of oil or wax. You can use hot, soapy water to wash this off (remembering to pat it dry before continuing), but the best way (I’ve found) is to burn it off. #BurningShitIsTherapy
You’ll need to ‘measure’ out approximately how much steel wool you need for the concoction. If you’ve purchased your steel wool on a roll, then it’s advisable to have an old pair of large scissors on hand to cut it (never be tempted to tear it). If you have pads, then just use as many pads as you need.
Stuff your estimated amount (you can always add more or remove some) into your glass container. You don’t need to completely compact the steel wool into the receptacle to fill all available space, just add enough to allow the wool to spring back a little.
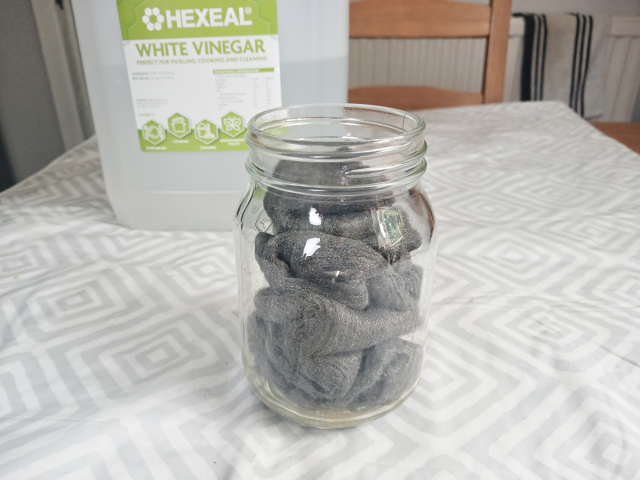
Now you have your amount of steel wool, remove it from the container and place it in an area that isn’t going to catch fire. I tend to use an outside wall, and a square of rusty steel plate I dug out of my garden.
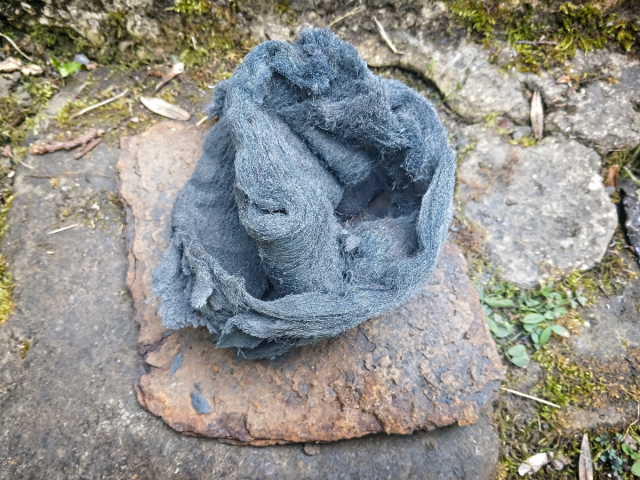
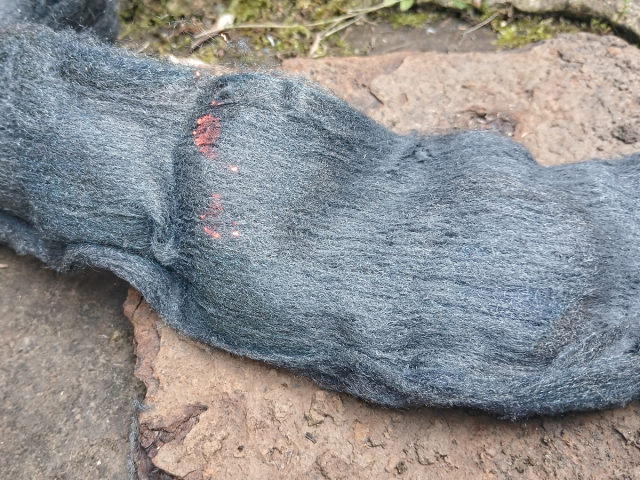
Using the chef’s brûlée torch or blow torch, touch the flame to the steel wool and watch as the oil/wax burns away, like the typical Hollywood-style dynamite fuse. You’ll need to turn the wool and repeat the process to ensure that all of the oil/wax has been removed (and you no-longer get the ‘fuse’ reaction).
Brew, Brew, Barney McGrew
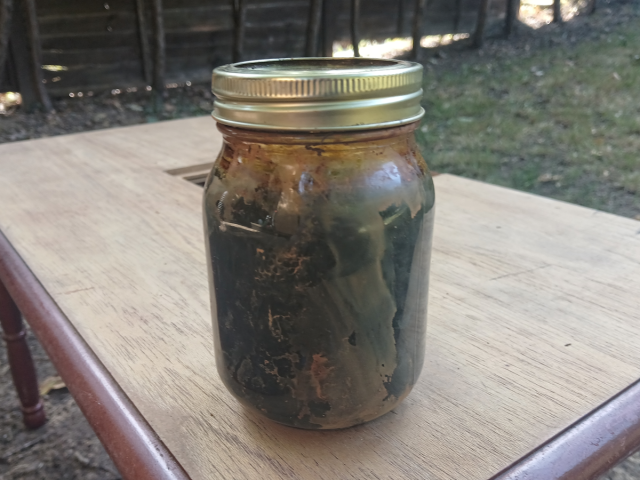
Once the protective oil/wax has been removed, it’s time to mix your ‘ingredients’ together. Place the steel wool back into your chosen container and completely cover it with the vinegar.
CAUTION: The brewing process is a chemical reaction. As a byproduct of this reaction hydrogen is given off, so DO NOT screw/clip on lids tightly. This will allow for the gas to release naturally and will not create potentially explosive pressure inside the container you’re using for the ‘brew’. Also (if you’ve seen the 1937 film footage of the Hindenburg disaster), you will know that hydrogen is a highly volatile gas and doesn’t do well around naked flames, sparks, or St. Elmo’s Fire (the weather phenomenon, not the 1985 film). So, it’s probably best not to keep your container in the house whilst the brewing process is taking place.
Every day, tighten the lid on your container and give it a bit of a shake to agitate the steel wool within the vinegar, to aid in the brewing process. REMEMBERING to loosen the lid again, after doing so. The process usually only takes two or three days (you will see the vinegar turn a dark brown colour), but I usually leave it a couple of days longer.
Taking The Strain
At the end of the ‘brewing’ process, the majority of the steel wool will have dissolved into the vinegar and you’ll just be left with bits in the bottom of your container. These bits will need to be strained out of the solution.
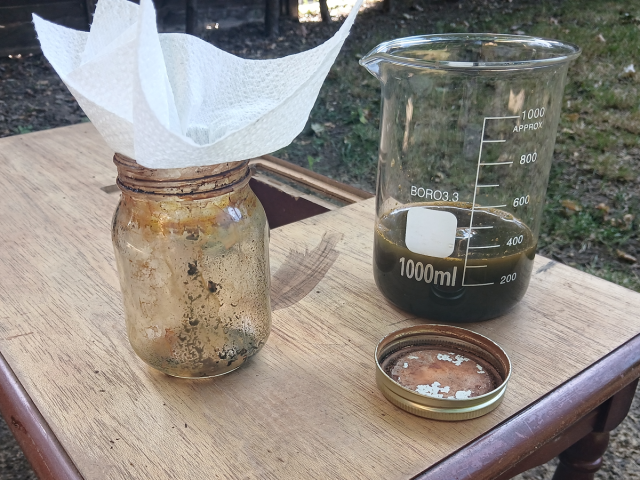
There are a few ways I’ve seen and/or heard mentioned to strain the steel wool remnants out of your Oak Burnish solution. You can use the likes of coffee filters, or old nylon tights/stockings, but as I don’t drink coffee (or wear nylons) I tend to form a piece of kitchen roll/paper towel into a rough cone shape and just use that. Which works well enough.
Grab your second glass container and pop your chosen filter type into the top. Carefully pour your solution into this second container, making sure the filter stays in place. If you don’t have two identical containers, you could temporarily pour your solution into an old jug first. Then give your glass container a quick rinse and wipe out (just to make sure all of the steel wool bits have been removed).
And that’s it. Your Oak Burnish is now ready to use.
The Hot Method
As I got this process from another article, I’ll pop a link to that one in the Further Reading And Footnotes section below. You’ll then be able to see the results that the author provided for the species of wood they used. This is also a (relatively) quick method of creating an Oak Burnish solution. So, if you’re pushed for time, I suppose this method can be used in a pinch.
What You Will Need
- 000 or 0000 grade steel wool
- Distilled white vinegar
- An old saucepan
- A glass container (lid optional, but preferably Borosilicate/Pryex®).
- An old pair of large scissors.
- A chef’s brûlée torch or blow torch (optional).
- Camping stove (either gas or electric).
- PPE (#NotYourMother).
The Process
Ditto
The initial steps for ‘The Hot Method’ are exactly the same for ‘The Cold Method’ detailed above. Measure out the amount of steel wool needed, remove the protective coating (however you choose to do this) and place it back into your chosen glass container.
The author of the original article does, however, suggest to “…tear the steel wool into small pieces…” before placing it into the container. They don’t stipulate whether this has any bearing on the results, but I did the same (although, I cut mine with scissors).
Plague Of Boils
The next step is where the two methods diverge. You now need to boil the vinegar..! The original article this process is taken from doesn’t go into any detail as to how they went about performing the boiling, or for how long.
CAUTION: As mentioned for ‘The Cold Method’ of making Oak Burnish, distilled white vinegar is an acid (although only a watered down solution) and this process requires that you boil the vinegar. So, it’s probably best to perform this step outside and NOT in the kitchen. Hence the camping stove in the above list.
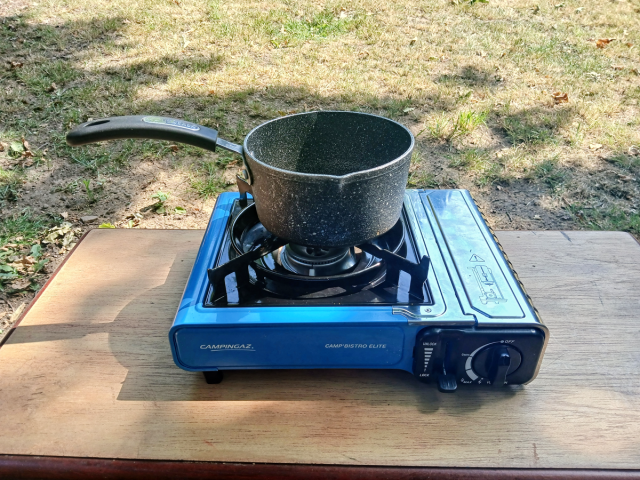
Also, the article suggests using a run-of-the-mill mason jar to pour the boiling vinegar into. Can anyone else see the potential issue with using a regular glass jar..? Let’s see; boiling distilled white vinegar (typically around 100.6°C/213°F), plus cold glass mason jar. Hmm..? At least the author of said article does suggest to perform this step outside.
Pro(lapse) Tip: If you are thinking of just using a regular glass jar (mason or otherwise), then I would suggest putting something metal into the jar before pouring. An old piece of cutlery maybe, or a scrap piece of steel bar or rod. Yes, I know the wool is steel, but you’ll want something heftier to conduct the heat into, to avoid any potential glass explosions.
What I used was a 1 litre Boro 3.3 beaker that I had laying around the workshop (who doesn’t..?), just to be on the safe side. I also used the same weight of steel wool and volume of white vinegar as I did for ‘The Cold Method’, even though the original article does suggest weights and measures to achieve different “shade” effects (a future experiment, maybe..?). But, I want to keep this a fair, like-for-like comparison.
Take A Scalding
When the vinegar is bubbling like a bugger (my words, not theirs), remove from the heat and carefully pour it over the steel wool in your container. This should be left for an hour (or so) to allow the reaction time to take place and to cool.
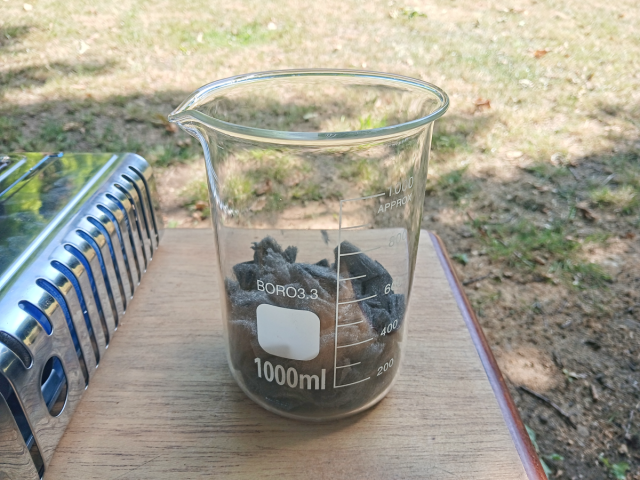
REMEMBER: No naked flames or sparks whilst this is happening. Hydrogen go boom..!
Once the solution has cooled, use an appropriate protective gloved hand to remove the steel wool from the solution. The author of the original article suggests squeezing out any residual solution from the steel wool. What happens to this discarded steel wool is not detailed anywhere in the original article. I can’t see how it could (or would) have any further use after its vinegar jacuzzi, but there you go (answers on a postcard).
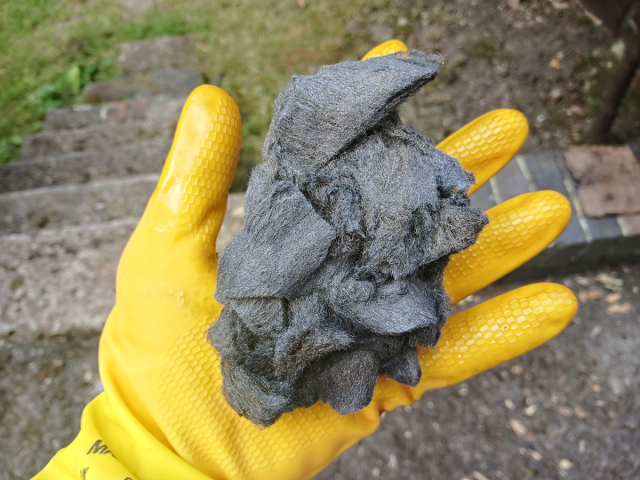
The solution is now ready to slap on your project (apparently).
Application Of Oak Burnish
You can apply the Oak Burnish solution to your project, as you would any other stain; bristle brush, foam (Jenny) brush, or clean rag.
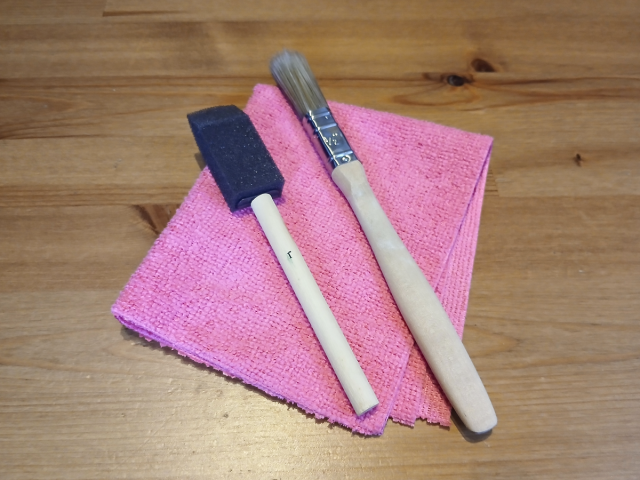
As mentioned near the top of this blog, the application of Oak Burnish is a chemical reaction (as opposed to a pigmented stain), so the results are instantaneous. As such (being a chemical reaction), I would suggest that further coats wouldn’t really add to the deepness of the effect produced (although I have yet to test this. Another future experiment..?).
The only thing that would definitely deepen the results (more so on woods with a lower tannin content) would be the application of a strong tea wash beforehand. Allow this wash to fully dry (a heat gun speeds this up considerably, if you’re impatient) before applying the Oak Burnish.
The Wood
All of the wood pieces I’ve used for illustration purposes within this blog were acquired from the Sketch Laser Cutting website. I want to take a moment to give a huge shout out to Maria over there, who went above and beyond to help me out with some extra species pieces. #NotSponsored
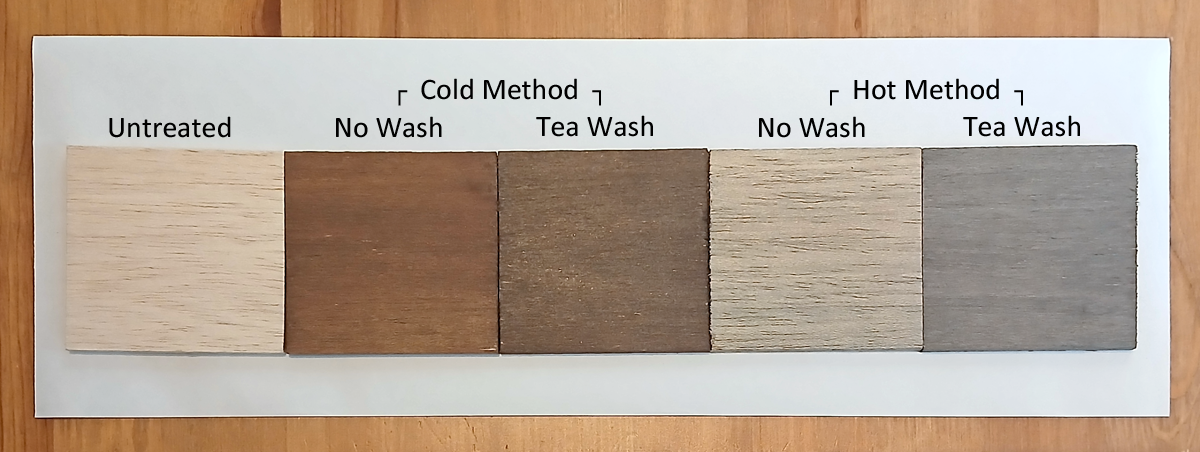
For this test I’ve used 80mm (-ish) square pieces, all of which are 5mm thick, in Ash, Balsa (‘cus they had it available), Beech, Mahogany, Oak (obviously), Spruce Pine and Walnut. I’ve included Balsa in this test pretty much just for shits and giggles. But, as I don’t think that anyone (to my knowledge) has ever tried Oak Burnish on Balsa, it’ll be interesting to see what happens.
Having said that, if there are any modellers or crafters out there that do use Balsa, then this might create an interesting effect for your projects. Especially, if you’re wanting to achieve an aged look for your piece without the usual painting/weathering techniques.
Aside Note: As I was writing the above paragraph, I had a flash of inspiration. If you had a model of a ship made out of matchsticks, would the application of Oak Burnish (and potentially a tea wash beforehand) make it look old and weathered without needing to paint it..? I have neither the time, nor the skills to try this out, so if anyone does have a go at this then please do let me know how it looks. Send pics.
The Results
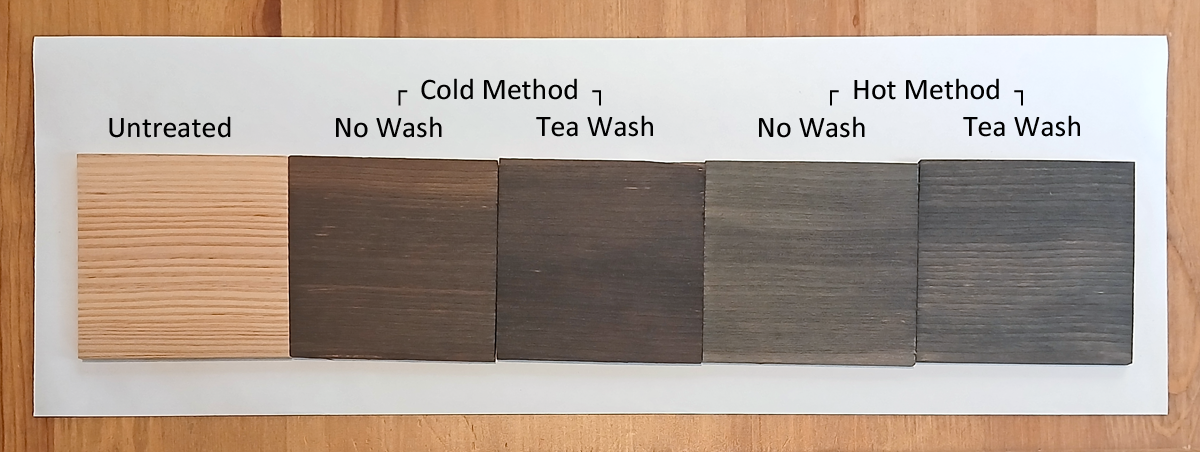
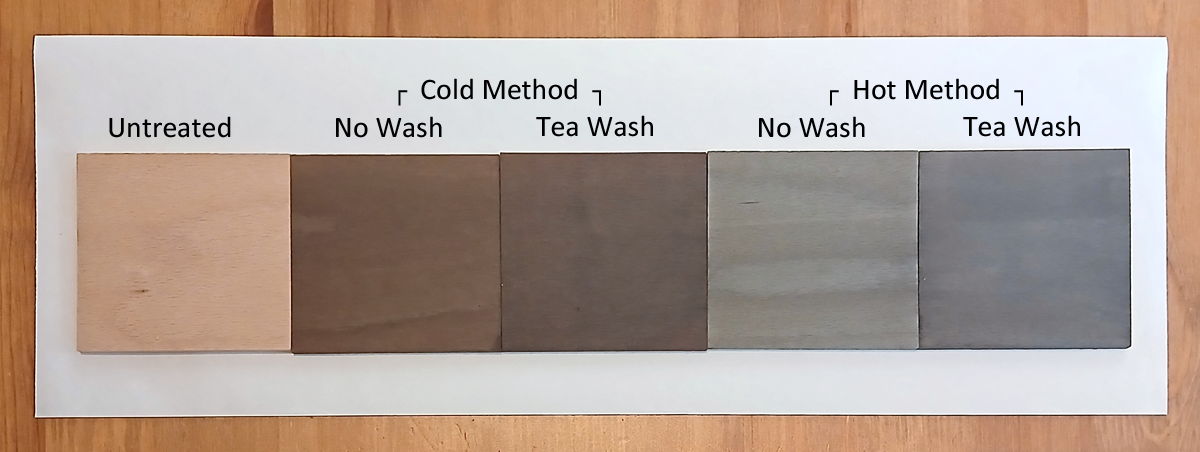
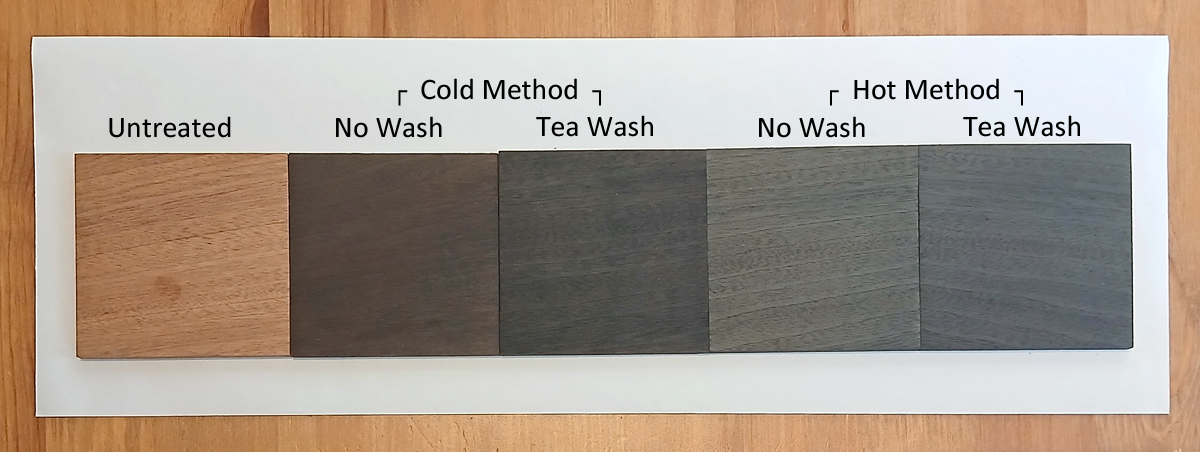
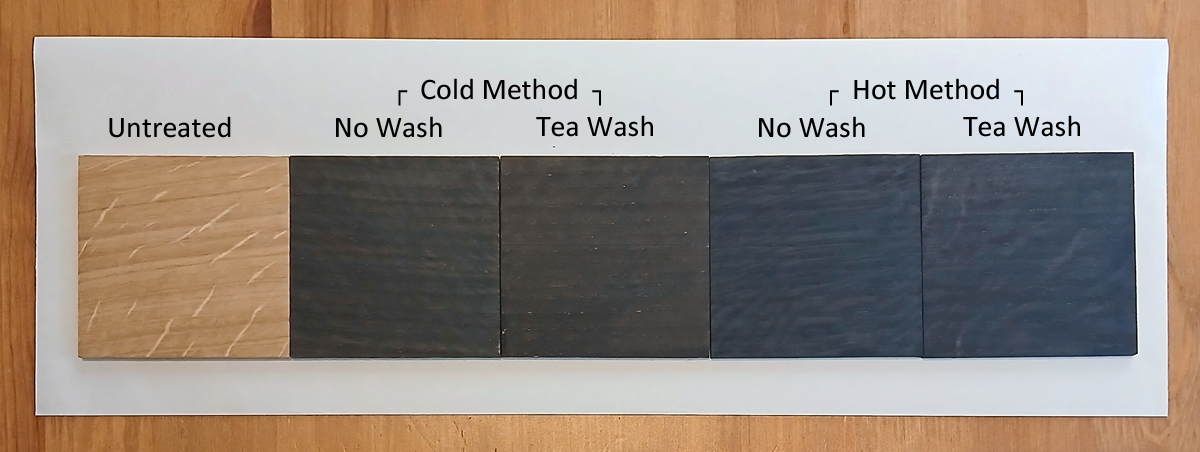
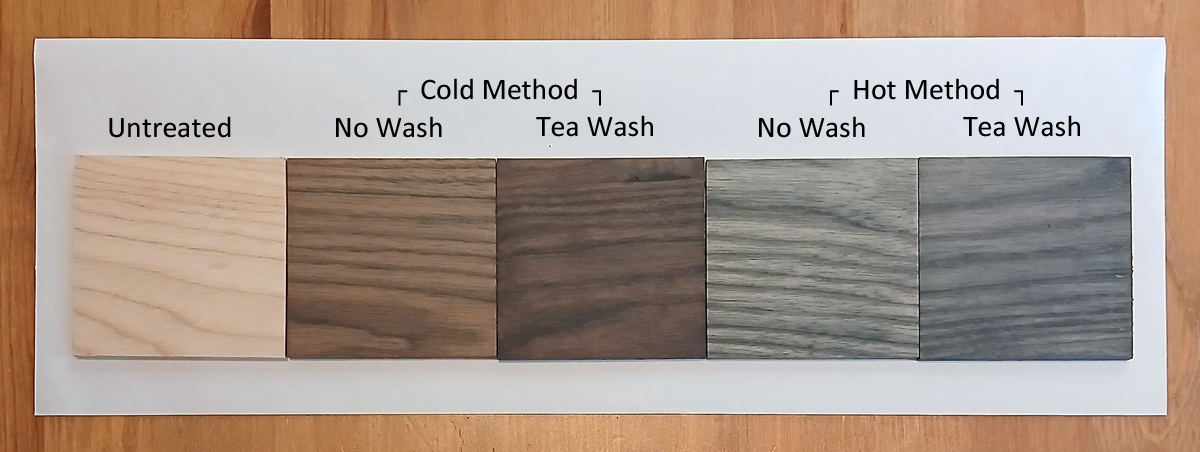
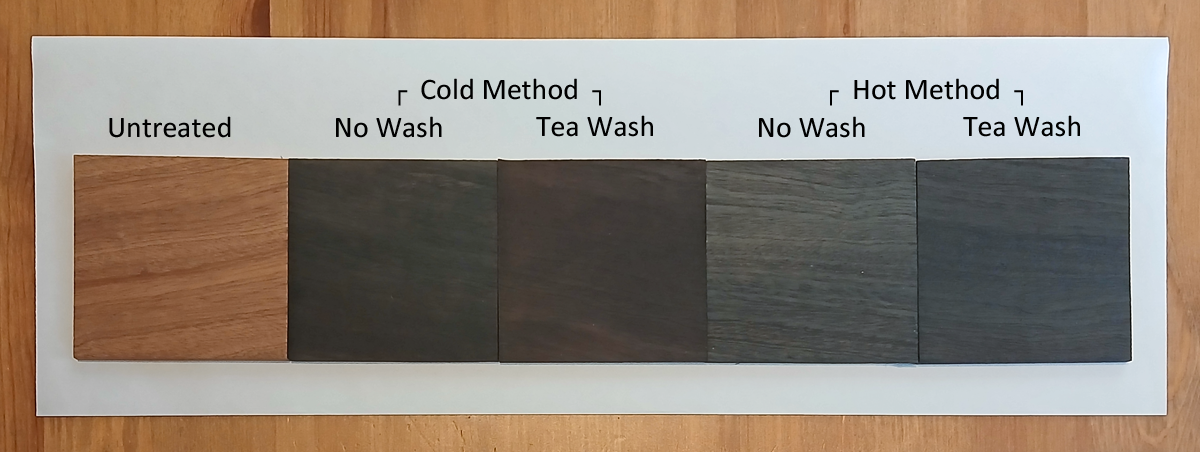
I shall let the results of this Oak Burnish test speak for themselves.
Ash
Balsa
Beech
Mahogany
Oak
Spruce Pine
Walnut
Conclusions
Looking at the results, it’s quite clear that the Oak Burnish created using ‘The Hot Method’ produces a greyer, colder hue to each of the wood species. Especially when compared side-by-side to the colour of the wood created by using ‘The Cold Method’, which is overall a browner, warmer hue.
The introduction of the tea wash before applying the Oak Burnish also creates (in the majority of instances) a deeper, richer hue to each wood species, irrespective of which method was used to create the solution. Seeing this also got me thinking; would different teas (or tea blends) produce different hue effects? Yet more future experimentation? Maybe.
The result that surprised me the most, was the effects of ‘The Hot Method’ Oak Burnish on the oak. I don’t think the above images do it justice, but it definitely has a purple tinge. More so with the sample that had the tea wash applied. I have an oak shelf project languishing in production hell, so this result has spurred me on to complete it and use ‘The Hot Method’ with tea wash to colour it. But then, what finish would look the best?
With all of this future experimentation, it’s a wonder that I’ll manage to physically get anything done..!
Anyway, you’re welcome.
C…
Further Reading And Footnotes
To read the full article for what I’ve referred to as ‘The Hot Method’, you can head over to the Gadgets and Grain website.
If you’re looking for relatively inexpensive wood sheets, like the ones I used for this experiment, then head over to the Sketch Laser Cutting website. Just tell ‘em Corum sent ya.
If you really must read the paper on tea cultivars, then click here to download a pdf copy.
For more information about me and all that is Silverhand Creative, go check out the About Me page on this website. I have a presence on Instagram and Facebook, where I post photos (and the odd video) of ongoing and finished projects. There’s also a YouTube channel, where you can see how I go about doing what I do and what tools I prefer to use. So, feel free (there’s no pressure) to follow and/or subscribe to any (or all) of the above.
If you’re feeling fruity, and would like to support my endeavours, then please head over to the silverhandstore.com webstore and treat yourself a little something. I am most definitely amenable to commission work and have a web form for you to get in touch, should you be looking for something a little more bespoke.
All trademarks (registered or otherwise) used in this blog lie solely with their respective owners.